
If you’ve been doing the rear delt row for a while but still don’t see that round, defined shoulder look, you’re not alone. Many lifters include this exercise in their routine but fail to get real rear delt growth not because the exercise is bad, but because small technique errors quietly steal the results.
The rear delts are one of the most undertrained muscles in upper body workouts, and they play a major role in shoulder shape, posture, and injury prevention. In this article, we’ll break down exactly where most people go wrong with the rear delt row, how to fix it, and how to finally make this movement work for you.
BIO
| Label | Information |
|---|---|
| Exercise Name | Rear Delt Row |
| Type | Strength training exercise |
| Primary Muscle | Rear deltoids |
| Secondary Muscles | Upper back, traps, rhomboids |
| Main Purpose | Improve shoulder shape and posture |
| Equipment Needed | Dumbbells, cable, or machine |
| Movement Pattern | Horizontal pulling motion |
| Key Benefit | Better rear shoulder development |
| Common Goal | Muscle growth and balance |
| Difficulty Level | Beginner to intermediate |
| Ideal Rep Range | 8–15 reps |
| Training Frequency | 2–3 times per week |
| Injury Prevention | Helps shoulder stability |
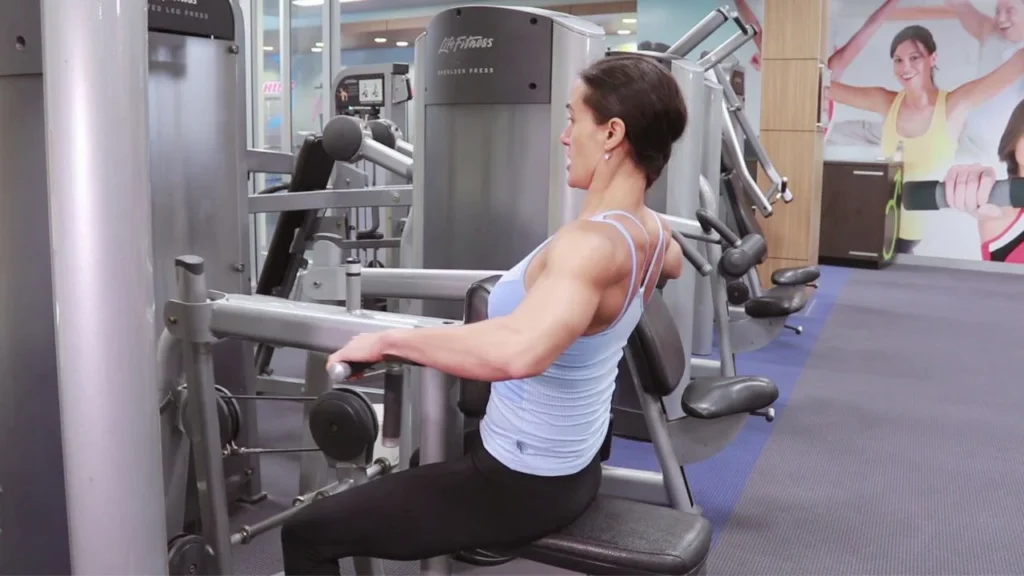
What Is the Rear Delt Row?
The rear delt row is a rowing variation designed to target the posterior deltoids (rear shoulder muscles) more than the lats or mid-back. Instead of pulling the weight toward your waist like a traditional row, you pull with your elbows flared outward to shift emphasis to the rear delts.
The rear deltoids are part of the shoulder muscle group known as the deltoid, which also includes the front and side heads. You can learn more about the structure of this muscle here:
Rear delt row vs traditional row
A standard row primarily works your lats and mid-back. In contrast, the rear delt row:
- Uses a wider elbow path
- Reduces lat involvement
- Emphasizes shoulder horizontal abduction
- Focuses on upper back isolation
Why rear delts matter
Strong rear delts help with:
- Better posture and reduced slouching
- Balanced shoulder development
- Improved pressing strength
- Shoulder joint stability
Neglecting them often leads to imbalanced shoulders and a “rounded” upper back appearance.
Rear Delt Row Mistakes That Are Killing Your Progress
Most people think they are doing the exercise correctly, but small form issues drastically reduce rear delt activation.
Using too much weight
One of the biggest mistakes is loading too heavy. When the weight is excessive, your body naturally recruits larger muscles like the lats and traps to compensate. This shifts tension away from the rear delts.
Fix: Reduce weight and prioritize control over load.
Turning it into a lat row
If your elbows are tucked close to your body, you’re no longer doing a rear delt movement you’re performing a standard row.
Fix: Keep elbows flared out at about 45–70 degrees from your torso.
Relying on momentum
Swinging your torso or jerking the weight removes tension from the target muscle and increases injury risk.
Fix: Slow down the movement and eliminate body swing completely.
Poor torso positioning
Standing too upright or leaning too far forward changes the angle of resistance, reducing rear delt engagement.
Fix: Maintain a stable hinge position with a neutral spine.
Short range of motion
Stopping halfway reduces muscle fiber activation and limits growth stimulus.
Fix: Pull fully until elbows are in line with or slightly behind your torso, then return slowly.
Ignoring mind-muscle connection
Many lifters just move weight without actually feeling the rear delts working.
Fix: Focus on squeezing the back of your shoulders during every rep.
Proper Rear Delt Row Form Step-by-Step Guide
Getting the form right is the difference between growth and wasted effort.
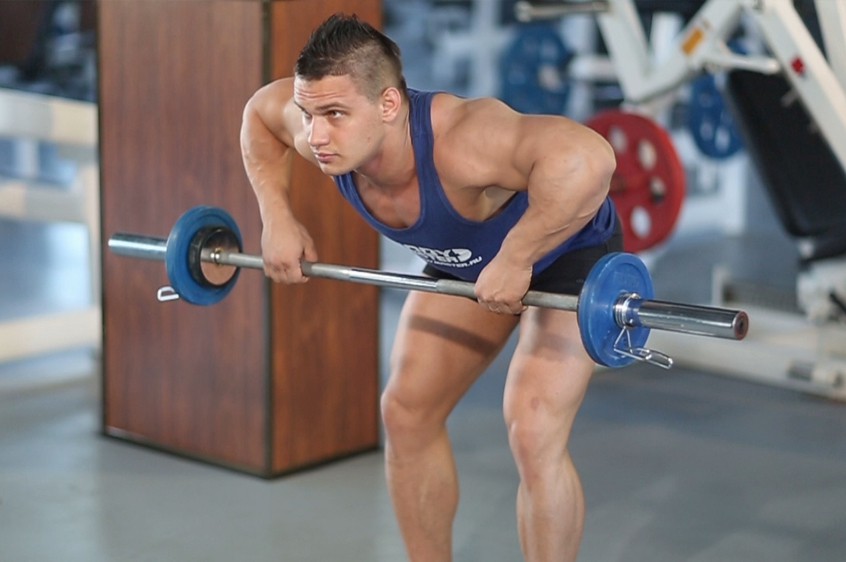
Step 1 Set your position
- Hinge at the hips
- Keep your back straight
- Let the weights hang naturally
- Brace your core
Step 2 Start the pull
Initiate the movement by driving your elbows outward and upward rather than pulling with your hands.
Step 3 Peak contraction
At the top, squeeze your rear delts for 1–2 seconds. Avoid shrugging your traps.
Step 4 Controlled lowering
Lower the weight slowly over 2–3 seconds. This eccentric phase is crucial for muscle growth.
Step 5 Breathing and rhythm
Exhale while pulling, inhale while lowering. Keep a steady tempo throughout.
Fixing Rear Delt Activation Problems
If you still don’t feel your rear delts working, the issue is usually technique or exercise selection.
Lower the weight immediately
Heavy weights almost always shift tension away from isolation muscles.
Adjust your grip
A slightly wider grip often helps improve rear delt engagement by changing elbow positioning.
Add a pause at the top
Holding the contraction increases time under tension, a key driver of hypertrophy.
Try cables instead of dumbbells
Cable machines provide constant tension, which helps maintain rear delt activation throughout the movement.
Best Variations of Rear Delt Row
Different variations help target the muscle from multiple angles and prevent adaptation.
Dumbbell rear delt row
Great for beginners and allows natural movement patterns.
Cable rear delt row
Provides continuous tension and smoother resistance curve.
Incline bench rear delt row
Removes lower back involvement and improves isolation.
Machine rear delt row
Ideal for beginners who need stability and strict form control.
Sample Training Plan for Rear Delt Growth
To build visible rear delts, consistency and volume matter more than heavy weights.
Beginner routine
- Rear delt row: 3 sets × 12–15 reps
- Face pulls: 3 sets × 15 reps
- Rest: 60–90 seconds
Intermediate routine
- Rear delt row: 4 sets × 8–12 reps
- Reverse fly: 3 sets × 12–15 reps
- Cable rear delt row: 3 sets × 10–12 reps
Training frequency
Train rear delts 2–3 times per week for optimal growth without overtraining.
Tips to Maximize Rear Delt Growth
Small adjustments in training can dramatically improve results.
Focus on slow tempo
Controlled reps increase muscle tension and reduce cheating.
Combine with pulling movements
Include face pulls, reverse flys, and upper back work for balanced development.
Don’t overtrain traps
If your traps dominate every row, reduce weight and refine elbow position.
Prioritize consistency
Rear delts respond best to steady, repeated stimulus over time.
Solving the “I Don’t Feel My Rear Delts” Problem
This is one of the most common complaints with the rear delt row.
Usually, the issue comes from:
- Using too much weight
- Pulling with the arms instead of elbows
- Poor posture setup
- Lack of control
The fix is simple but requires discipline: slow down, reduce weight, and consciously squeeze the rear shoulder on every rep. Once you feel them working properly, growth becomes much easier.
Conclusion
The rear delt row is one of the most effective exercises for building balanced, aesthetic shoulders but only when done correctly. Most progress stalls because lifters unintentionally turn it into a back exercise instead of isolating the rear delts.
By fixing your form, controlling the movement, and prioritizing proper muscle activation, you can turn this simple exercise into a powerful tool for shoulder development. Focus on quality over weight, stay consistent, and your rear delts will finally start to catch up.
How to Master the Seated Calf Raise for Maximum Growth
FAQ: Rear Delt Row Mistakes and Form
Why don’t I feel my rear delts during rows?
You’re likely using too much weight or keeping your elbows too close to your body.
How heavy should I go on rear delt rows?
Use a weight that allows strict form and full control for 10–15 reps.
Are rear delt rows better than reverse flys?
Both are effective. Rows allow more load, while flys improve isolation.
How often should I train rear delts?
2–3 times per week is ideal for most people.
Can rear delt rows fix rounded shoulders?
They can help significantly when combined with posture work and upper back training.